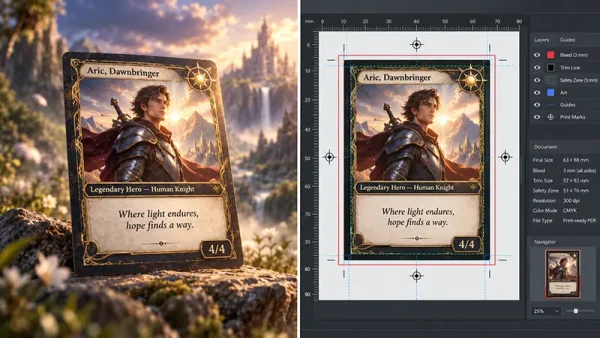
Author’s Note: Hi, I’m Wensong Li, Prepress Design Director. In my nine years leading prepress operations, I’ve seen too many brilliant card games derailed by avoidable technical oversights. From muddy CMYK conversions to dieline mismatches that ruin entire print runs, these hidden errors cost creators serious time and money. I meticulously preflight artwork every day to prevent exactly these disasters. Before you send your files to the factory, let me walk you through the five critical prepress checks that will save your next project.
Here’s a scenario we see all too often: You’ve spent months perfecting your game mechanics, playtesting every rule, and commissioning breathtaking artwork. The Kickstarter funded at 300%, and you are ready to hit print. But when the finished goods arrive at your fulfillment warehouse, the cards don’t fit in the box, the colors look muddy, and the glue seams are popping open.
Whether you’re fulfilling a 500-unit Kickstarter campaign or placing a 10,000-unit retail order, the packaging decision you make before your designer opens Illustrator will determine whether your print run ships on time — or gets scrapped and reprinted.
Below is a structured breakdown of the five most critical pre-press specification errors that cause reprints, delays, and budget overruns for first-time bulk buyers, along with the exact technical standards you need to hold your manufacturer to.

The Procurement Risk Checklist: Why Good Designs Fail on Press
Most print run failures are not caused by bad design. They are caused by specification mismatches that go undetected until the job is already on press.
⚠️ Factory Note: The single most preventable cause of reprint requests we see from first-time clients is a mismatch between the card stock caliper and the box internal dimension. A client will spec a tuck box based on a 300 gsm card stock, then switch to 310 gsm during production to improve card feel — a 10 gsm increase translates to roughly 0.05–0.08mm additional caliper per card. Multiply that across a 54-card deck and the finished deck no longer fits the box. Always finalize your card stock specification before ordering packaging, and provide your factory with a physical card sample or confirmed caliper measurement — not just a gsm number — when requesting a dieline.
Let’s unpack the five specific pre-press errors you must avoid.

Risk #1 — Wrong Board Weight: How Choosing 310 gsm Fails Auto-Insertion Lines
Modern tuck box production lines use automated card insertion equipment that feeds finished cards into pre-glued boxes at high speed. These machines are calibrated to a specific range of board rigidity.
A tuck box manufactured from 310 gsm SBS board will flex under the mechanical pressure of the insertion arm, causing the box to buckle, jam the feed mechanism, or fail to hold its shape after insertion.
- The Industry Standard: For tuck boxes running on automated insertion lines, you need 350–400 gsm SBS.
- The Cost of Failure: At 310 gsm, field failure rates on high-speed insertion lines run at approximately 8–12% per thousand units — a figure that scales linearly with run length and worsens significantly in high-humidity environments where board moisture content rises above 6%.
- What this means for you: An 8–12% failure rate on a 2,000-unit run means 160–240 boxes that can’t be fulfilled. That’s not a rounding error — that’s a customer service crisis and a reprint cost you didn’t budget for.
Practical Rule: If your manufacturer quotes you 310 gsm for a standard tuck box intended for automated fulfillment, request an upgrade to 350 gsm minimum before approving the material spec sheet.

Risk #2 — RGB File Submission: The 15–25% Color Shift on Press
Offset lithographic printing deposits ink in four channels: Cyan, Magenta, Yellow, and Black (CMYK). The press has absolutely no mechanism to interpret RGB color data.
When an RGB file is submitted, the RIP (Raster Image Processor) performs an automatic RGB-to-CMYK conversion using a default profile, typically sRGB IEC61966-2.1 to ISO Coated v2. This conversion is not neutral:
- Saturated colors — particularly deep blues, vivid greens, and neon tones — compress significantly in the CMYK gamut.
- The resulting color shift on press ranges from 15% to 25% for highly saturated values.
- Out-of-gamut colors such as RGB (0, 0, 255) pure blue can shift by 30–40%.
What this means for you: Your carefully designed box art arrives at the warehouse looking duller and flatter than anything you approved on screen. There is no press-side fix — the job has to be reprinted from a corrected file.
Correct Workflow:
- Set your document color mode to CMYK in Adobe Illustrator or Photoshop before beginning design work.
- For brand-critical colors, specify Pantone Solid Coated swatches (for gloss lamination); use Pantone Solid Uncoated for uncoated finishes.
- Request a press proof or contract proof before approving a full production run if color accuracy is critical to your brand.

Risk #3 — Insufficient Bleed and the Glue Flap Dead Zone
Bleed is the extension of background artwork beyond the finished trim line, designed to prevent white paper edges from appearing after die-cutting. The standard bleed for tuck box packaging is 3mm on all four sides of every panel.
However, bleed alone does not account for the glue flap dead zone — a separate constraint imposed by automated gluing equipment. Auto-gluing machines apply adhesive to the glue flap using a nozzle or roller that requires a clear, ink-free zone to achieve a clean bond. If printed artwork — including background color fills — extends into this zone, the adhesive bond is compromised, resulting in delamination or open-seam failures in the finished box.
Safe Zone & Dead Zone Specifications:
- Glue flap dead zone: 8mm from the fold score line, inward toward the glue flap panel. No critical artwork, text, or solid ink coverage should appear within this zone.
- Critical element safe zone: All text, logos, and critical graphic elements must sit a minimum of 5mm inside the trim line.
- Window box clearance: For window tuck boxes, the PET window aperture requires an additional 2mm clearance between the die-cut edge and any printed element.
What this means for you: Open-seam failures discovered after fulfillment mean individual box replacements — at your cost, shipped to individual backers. At 500 units, even a 5% seam failure rate generates 25 replacement shipments. Fixing the dead zone in your file costs nothing. Replacing 25 boxes does.

Risk #4 — PET Window Misregistration
Window tuck boxes require a secondary die-cutting operation to create the aperture, followed by application of a PET film window to the inside face of the box blank.
The registration tolerance between the printed aperture border and the actual die-cut edge is ±0.3mm.
- At ±0.5mm or greater: misregistration is visible to the naked eye at retail shelf distance.
- At ±1.0mm: the entire print run is typically rejected by quality control.
Root cause: Misregistration at this scale is almost always a pre-press issue — specifically, the window aperture in the supplied dieline not matching the factory’s actual cutting die dimensions. Always request a factory-issued dieline for window tuck boxes — never use a generic template.
Risk #5 — Dieline Mismatch: The Cost of Generic Templates
A dieline is the two-dimensional cutting and folding template that defines every panel, score line, glue flap, and structural dimension of a packaging format.
Generic dieline templates downloaded from the internet are built to approximate industry-standard dimensions — not to the exact tolerances of a specific factory’s cutting dies. The consequences of a dieline mismatch range from minor (score lines that don’t fold cleanly) to critical (box panels that are 1–2mm too wide or too narrow to close properly after gluing).
At production volumes of 500+ units, a structural failure caused by a dieline mismatch results in a full reprint — there is no partial remedy.
💡 Frequently Asked Questions (Pre-Press & Production)
Q: Can the factory fix my RGB files for me before printing?
While a factory prepress team can convert your RGB files to CMYK, doing so automatically shifts the colors. Because the factory doesn’t know exactly how vibrant you intended the original art to be, they cannot guarantee the converted CMYK file will match your vision. It is always safer for the creator or designer to handle the CMYK conversion and adjust the color balance manually.
Q: What is the difference between a digital proof and a hard proof?
A digital proof is a PDF used to check layout, bleed, and text positioning. It cannot be used to verify color accuracy because every computer monitor displays color differently. A hard proof (or press proof) is a physical sample printed on the actual substrate, allowing you to verify exact color output and structural integrity before the full run begins.
Next Steps: Secure Your Print Run
The dieline is free. The reprint is not.
Requesting a factory-issued dieline before your designer begins artwork placement takes exactly one email, and it eliminates the single most common cause of structural failure in first-time bulk orders.